Showing posts with label projects. Show all posts

Sunday, July 28, 2013

Timber.

 We had our ladies lunch last week at church.  I had the SIMPLE task of adding a little something to the tables.  I went to town, bought a bunch of crap ( in my mind it was going to be beautiful).  Put it on the tables.  Stepped back and thought to myself - YUK!
 
I then removed the failed vision from the tables.  Called Mike and asked if he had time to meet me at home with his chainsaw.  I think he said "sure!"...maybe not.
 
He cut down a tree {it needed to go anyway - two birds} and then cut twenty "disks" from the trunk.  We gathered all the Mason jars we could find.  Added a candle and ribbon to the small ones and flowers to the larger.
 
SO MUCH BETTER....and FREE!
 
 
The dining hall in our church doesn't have much ambience.  We do what we can.

 
For the flowers we used fern leaves, hosta leaves, coneflowers, daisies, purple salvia, sprigs of thyme, and some snow-on-the-mountain...all from our yard.  There was room for more greens in each jar but I was getting stingy with my flowers.  Last year was so dry that I didn't have many...this year I'm appreciating them as they should be appreciated.


...cards out of scrapbook paper with friendship/sister/girly quotes and a copy of
some old pictures we had.
 
We also used 3 yard lengths of 12inch wide burlap for table runners.  Add a funky green napkin, tableware, and the program and it looked complete...as opposed to the first mess-up.
 {I cannot show anyone my first attempt - it was much too sad - you'll have to trust me.} 
 
The kids said that they weren't surprised when I changed everything last minute. Hmmm.
 
Becky


Friday, May 31, 2013

Bling!

The girls needed new work coats.  Dark brown and light brown were their options.  #3 was less than thrilled about her choices.  Taking the "glass half full approach", she chose the light brown one so that she could BEDAZZLE IT!!!!


...and BEDAZZLE she did.
 
Hoping your last day of May is warmer than ours...
 
Becky and the Cattle-Working Crew

Thursday, October 11, 2012

Best Friend Pillows

I had these ugly pillows that needed a new look.  I never enjoyed making pillow covers because I don't like to hand sew the opening together...LaZy!!
 
But NOW ... NOW  I've learned to make them envelope-style and every throw pillow in my house is being recovered.  Easy peasy.
 

 Using the custom paper size option with Microsoft Publisher, I came up with just the right size creature I wanted on each pillow.
 

When you print it looks like the "tiles" below.
Then tape the tiles together, transfer to Ultra Heat-n-Bond (I have an unhealthy loving relationship with this stuff), cut out of desired fabric, and iron that baby on to your pillow cover.  I used black duck cloth on blue and white ticking.  I also stitched around my dogs...just because.  Don't really need to stitch with the Ultra stuff.  As a matter of fact, every REAL seamstress out there is saying right now, "Can't believe she sewed through Ultra Heat-n-Bond.  That stuff will gunk up her needle somethin' terrible."  I know and the needle has been replaced.
 
 
 And here we have Tess, our Golden Retreiver, and Woody, our Newfoundland.
  
 
...a great accent to the boys' beds.
 
Becky

Tuesday, September 18, 2012

Sewing with #3

While the oldest two were away at 4-H camp this summer, #3 and I had a
"just me and you" sewing day.

First up ... a skirt.

 
Look, Mom!  I used pins! 
Mom said to me, on more than one occasion, that she didn't know how any of my sewing projects ever turned out because I NEVER use pins.  With kids...you HAVE to use pins...UGH!

 
The hem IS even.  She's just sticking her booty out for comic relief.


Then on to the pennant banner for the girls' bedroom.
 
She cut out the triangles.
 
 
I PINNED them onto the bias tape... right side down.
 
#3 stitched them together with a zig-zag stitch.


I finished the other one because attention deficit set in and she had TV to watch before the other two got home.

This is a super simple project even if you don't sew...use fabric glue or heat-n-bond.
 
Later-
B

Thursday, July 26, 2012

Tent

The 4-H countdown is on!  #2 made this little number for her child development project.  We found the project at Lowe's Creative Ideas.  Keep in mind that SHE did NOT do ALL of the work BY HERSELF.  She and I (with some help from Dad) put this thing together.  It's fun when I get a chance to work on a project with one kiddo individually.


The covering is a painter's drop cloth.

IMPORTANT:  wash the drop cloth BEFORE cutting it to the correct width.  We thought we had this baby licked.  We washed the fabric.  We placed it back on the frame.  #2 was ready with the staple gun and we realized that instead of being four inches too wide it was now TWO inches too short. This shtuff  (< not a typo) SHRINKS!

Instead of falling in a heap on the grass like a frustrated 3 year old (me not #2) we decided to add the jute webbing to the ends.  Problem solved and it adds a nice contrast.


This sucker is big!  #2 and I both fit inside comfortably.  This is going to be her reading hideaway.  When it comes home from Achievement Days it will be donned with Christmas lights and large fluffy floor pillows. 

We kept the color neutral so it could be passed on to #4...
and it's easier than hemming a large piece of fabric on all 4 sides.


Tess enjoyed the shade from the 100 degree temps.


Here's to creating with your kids. 

 It's amazing what they tell you when you have time like this together.  Sometimes they are waiting for just the right moment to ask you that thing that's been on their mind.  What better place for these conversations than in the garage/workshop/craftroom/...

Becky

Tuesday, December 27, 2011

Centerpiece

Oh my goodness I have SO patted myself on the back for the creation of this centerpiece for our Christmas Day celebration.  Forgive me if I seem to be bragging, but honestly, I am.

Our dining table extends to 10 feet long and I wanted something to completely fill the space...well, leave a little room for eating.  I was checking in on Donna at Funky Junk during a mind-numbing blog surf and found her centerpiece.  It was perfect!  I changed the theme a bit for my vision.  Check it out!


 Obviously, I went with the baking thing.  I had a few of these things but a stop at one of my favorite antique stores filled in the gaps.  By the way... this "favorite antique store" of mine sent me an actual "thank you for the business this year" Christmas card.  Can you guess who opened it before I got to it?  That's right.  It was Mike.  Now can you imagine what may have been running through his head when he figured out who it was from?  Trouble right here in River City.  Actually, he just laughed because someone ratted me out about my shopping adventures.

I had to give the owner some grief about letting my husband in on my shopping habits.  I warned Mr. Shop Owner Man that he had better keep our antique/junk dealing relationship on the down low or he may never see me again.  He of course realized that was on empty threat but smiled and gave me 20% off my purchase.  I guess I'll go back. 

Most of the greenery is real.  Just went out and snipped off some branches from the shelter-belt.  Don't really know why I haven't done that before.  Real stuff gets thrown away and you don't have to STORE it!  Brilliant!  It smells good too.


I set the whole thing up on a muslin table runner.  It really cannot be moved with ease.  If I would have planned better I would have set up a little wooden number of some kind to assemble everything on top of...next year.


The cookbook page was added later.  It was a sign.  I was cleaning out a bunch of books and the page fell on the floor.  Check out the recipes.  {A bit blurry - sorry}  If that doesn't say Christmas, I don't know what does!

Becky

Friday, December 9, 2011

Freezer Paper

Just in case you don't know of the perfect union between freezer paper and the Cricut...

Cut out the desired shape, number, character on your Cricut {make sure to put the shiny side DOWN on the mat}.  Have your 6 year-old "weed" the parts you want to paint.


Iron the freezer paper to the fabric shiny side down.  I usually use a medium setting on my iron...depends on the fabric.


Have the continually talking 6 year-old paint inside the stencil.  I just use acrylic paints unless we're doing t-shirts.  Then we use fabric paint so that we can wash the finished project.


Stand up and smile.
Allow to dry.


Peal off the stencil and admire.


This is a great kid project.

They could be used for just about anything. 
These two are going to be pillows in the Little Red House...
maybe they will be finished by this Christmas.

Feeling behind in my Christmas duties...anyone else?

Becky


Monday, October 10, 2011

Turkey Tree

I'm always looking for an excuse to decorate a "Christmas" tree.  During a recent mind numbing blog hopping hour or two I came across Sugar Pie Farmhouse.  She goes to incredible lengths for her fall decor.  Her "Save Your Fork" tree inspired me to do the same.

My tree is the top of a full size white tree that I bought "real cheap, Clark" from a floral shop.  It had been stored in the sun over the summer and turned the perfect ivory color...well, perfect for me...not so perfect for the shop owner.


We used the Cricut to cut out the tags and hung them with twine.  We pasted a few copies of old Thanksgiving postcards on to some of the tags.


The best part is the old tarnished silverware.  The forks and knives are tied on with scraps of muslin.


Lucky number 7.


Gotta love a turkey.  God giggled when he made these guys.


Found the box in the barn.  Sprayed it with a bleach and water combo.  Rinsed it with water and watched the yuk wash away.  No scrubbing needed.


I was inspired by Beyond the Screen Door when I made the table runner.  It's burlap with a fu-fu ruffle on both ends.

Sidebar:  Shortly after I took these photos the tree crashed to the ground.  I was mad.  It laid there for 2 days.  Then I said to myself, "Aunt Ruthie wouldn't leave her tree on the floor." 
I put on my big girl boots and reassembled the darn thing. 

Enjoying Fall-
Becky

Thursday, September 22, 2011

Company's Coming

Hey, girls!

My sister is coming this weekend!  I'm so excited for her to be here because I have lots of projects planned for us to do together {she doesn't know that, yet... she says with an evil taskmaster tone}.

I had to show you how we decorated the bed in The Little Red House for her stay.


Do I mean anything by this?  Of course, I do.  Hellooo... she's my sister! 
 Even better...my LITTLE sister.


The idea for the "Wicked" banner came from Miss Mustard Seed. 
I love her stuff and want to grow up to be just like her.


The bed was my grandmother's.  It was 1960's maple - not 1930's oak - therefore, I felt comfortable painting it FLAT black.  Think it looks cool with the wood on the walls.


The holster came from a little antique store in Franklin, IN.  Quite the cowboy look.


For the "cowhide" pillow, I tea-stained black and WHITE fabric that were curtains in the girls' room.  Then sewed them together with chunky flat-fold seems.

The witch pillow...I ADORE the witch pillow.  Mostly because I love using freezer paper stencils.  I used the CriCut to cut a stencil of the witch - ironed it on to the fabric {waxy side down} - then used soft black to paint the witch onto the fabric/drop cloth.  Then whip it into a pillow. 

Sidebar:  I get all of my "pillowforms" from Goodwill.  Usually, throw pillows are only a dollar and after a wash they are more than great under another homemade pillow cover.


The dress form is dressed in a thrift store black witch-like dress and draped in orange organza.  The orange came from the fabric bin at Goodwill.  Kinda fun, huh?

I'll share our weekend projects soon.

Sleep tight!
Becky

Sunday, September 18, 2011

Cattle For Sale

Happy Sunday evening! 
Hope you've all had a relaxing and/or productive weekend.  Whichever you prefer.

I saw this photo in the September edition of Country Sampler.  I'm not usually one for stuff THIS primitive but the sign on the wall caught my attention. 
 

We don't have pigs anymore but, hey, we've got some cattle around. 

Here's how it went...

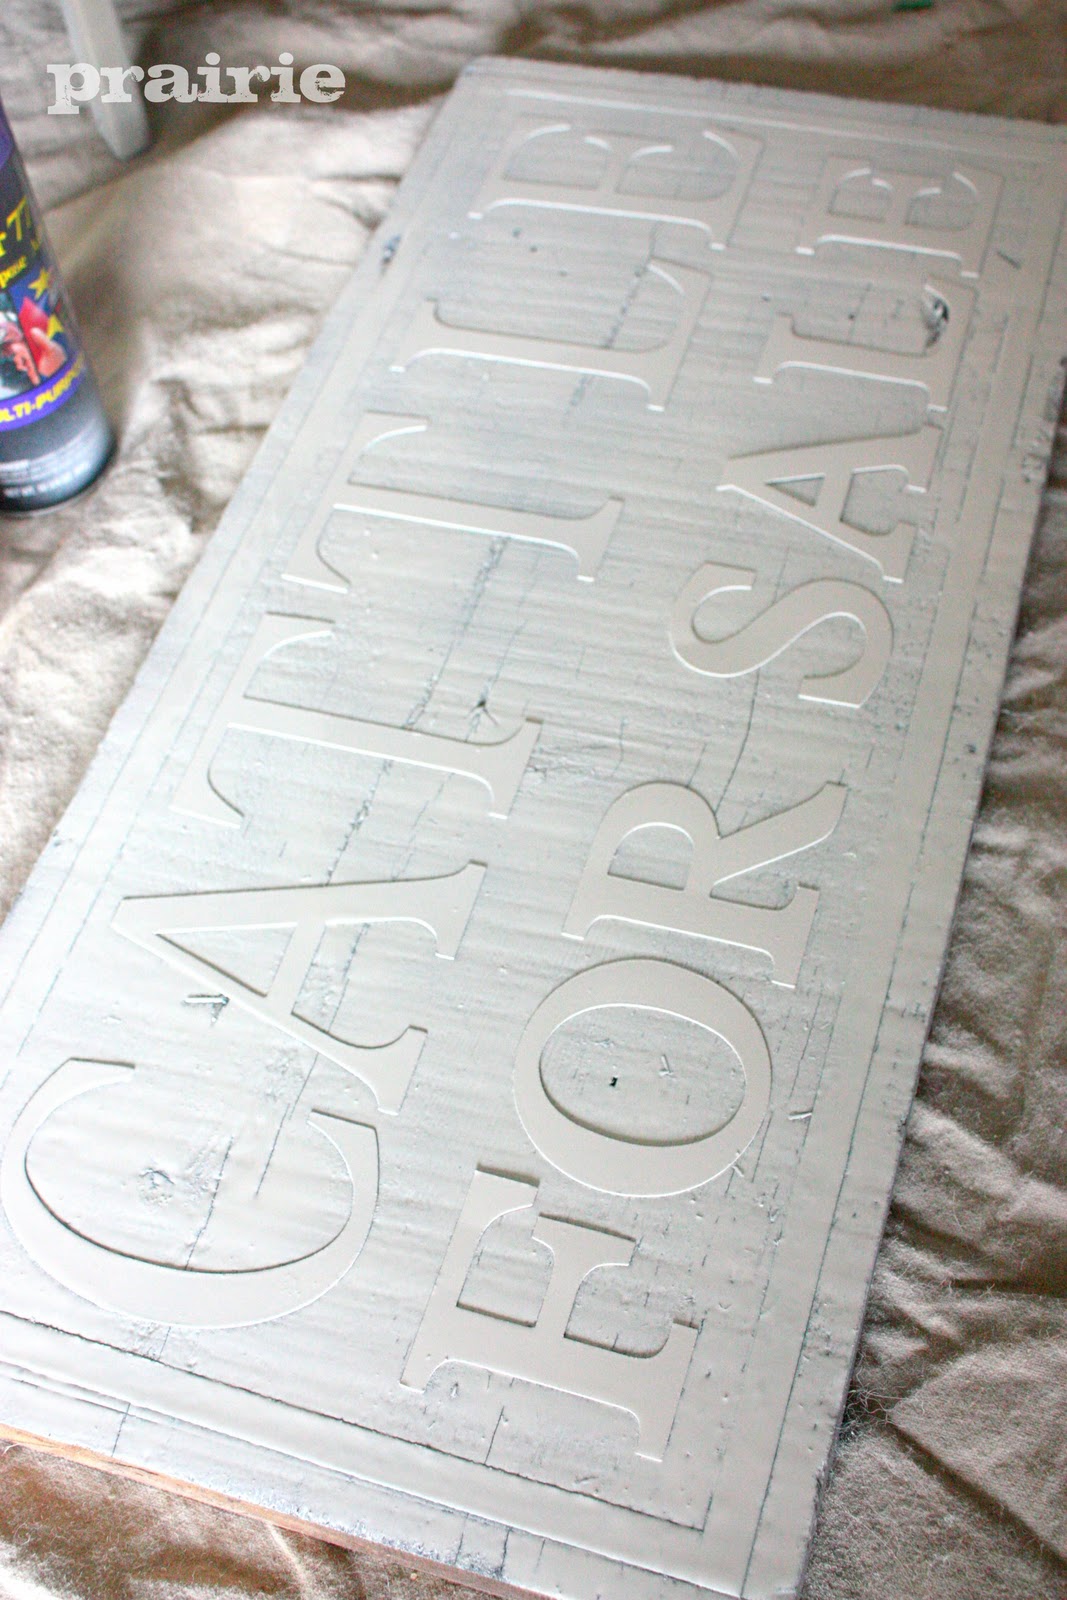
Found the perfect rough-sawn board in the barn.  Spray painted it black.  Did a reverse stencil thingy-thing.  Cut out the letters on the Cricut and used spray adhesive to stick them on the board.  The edge is masking tape.


Spray painted the whole thing with white paint.


It wasn't perfect when I took the letters and tape off...but that's the way we want it now, don't we?


I abused it with the sander and rubbed a coat of "Early American" stain over the whole thing.

The result is a vintage-been-on-a-fencepost-for-30-years look.


I'm STILL squealing with delight when I walk through the dining room
. 

My cowgirl model likes it too.

Later Taters-
Becky